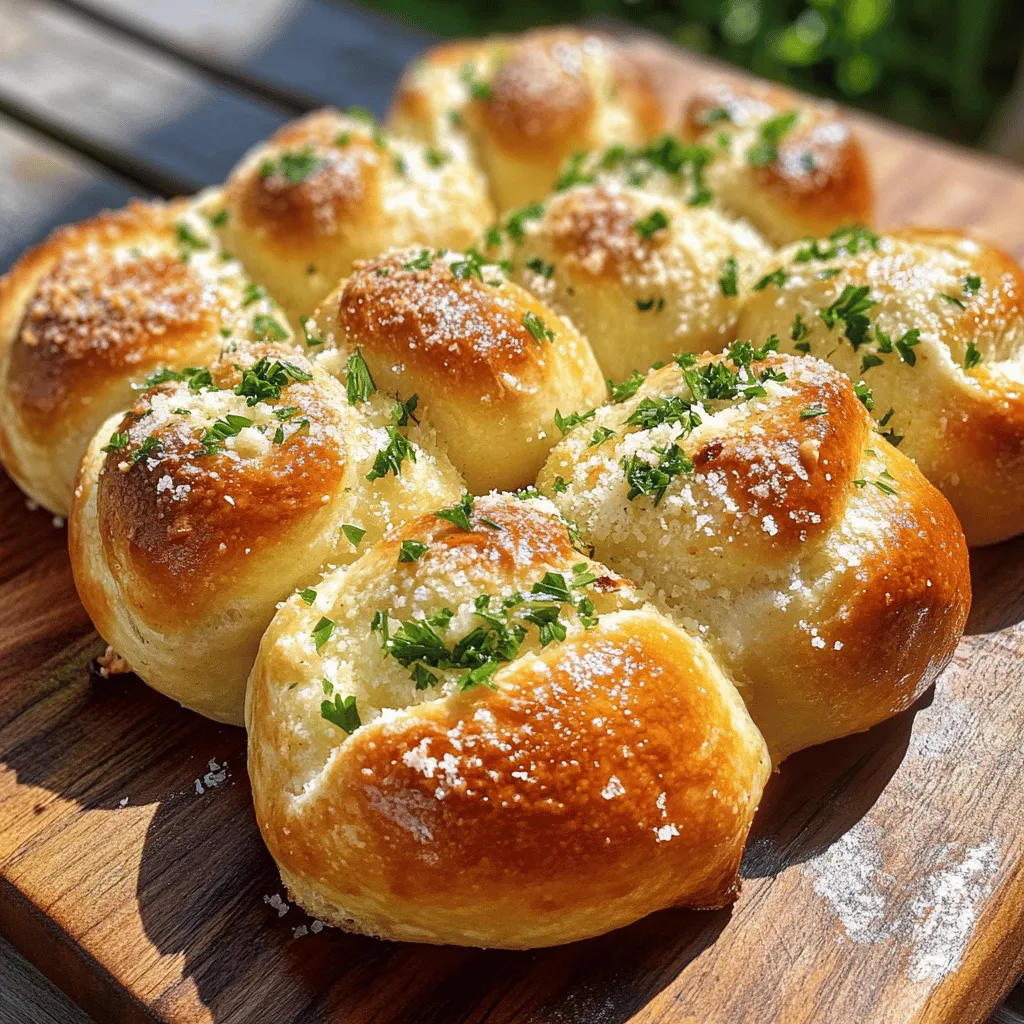
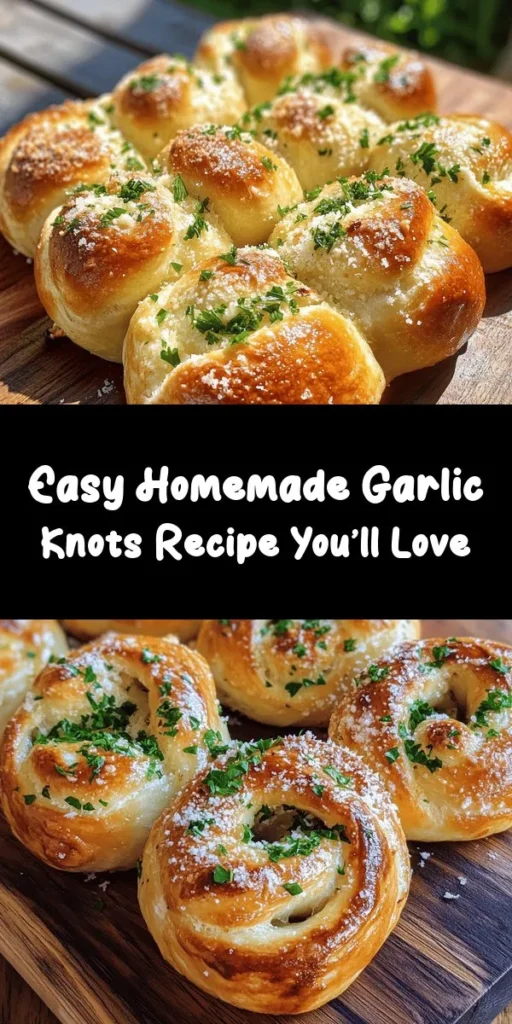
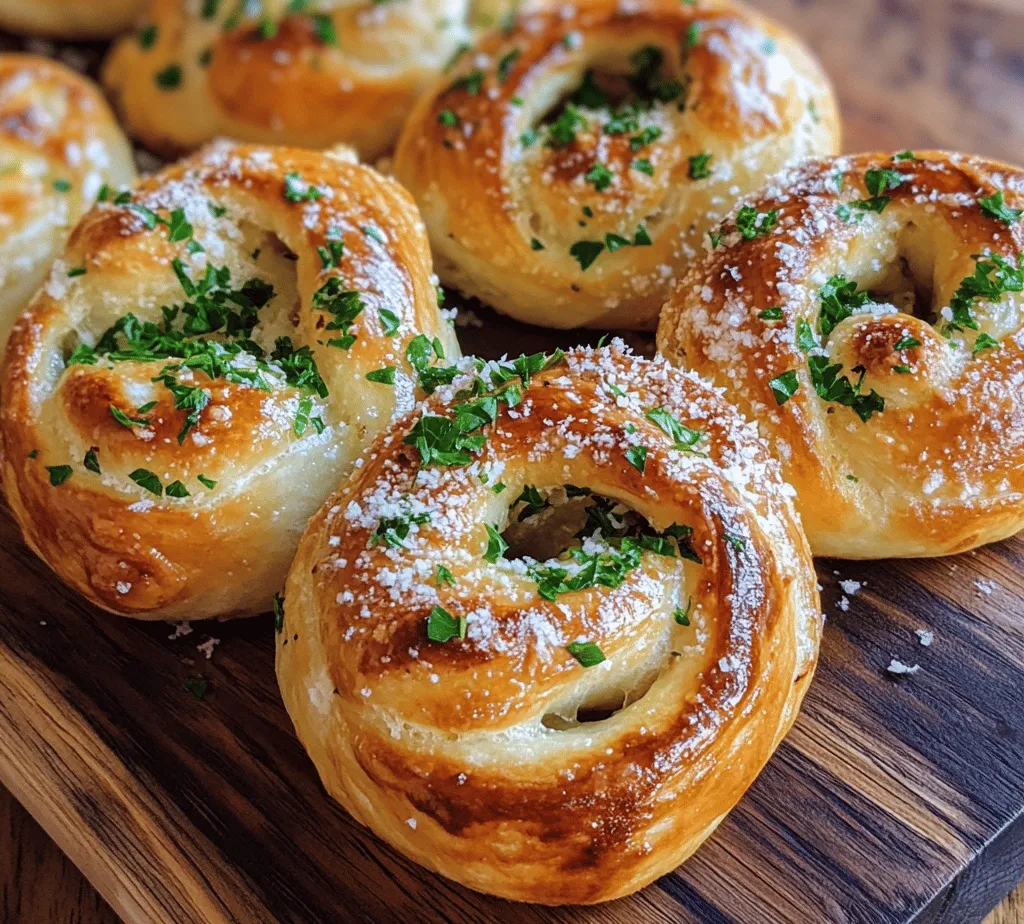
When it comes to comfort food, few dishes evoke the same warm, nostalgic feelings as garlic knots. These delightful, doughy treats are a staple in pizzerias and Italian restaurants, celebrated for their soft texture and irresistible garlic flavor. However, there’s something truly special about making garlic knots at home. Not only does crafting them from scratch enhance their flavor and texture, but it also allows you to customize ingredients to suit your nutritional preferences. In this article, we will explore the joy of creating homemade garlic knots, guiding you through their historical background, the essential ingredients, and the initial steps to make them.
Understanding the Essence of Garlic Knots
Garlic knots have a fascinating history rooted in Italian-American cuisine. Originally, they emerged as a way to use leftover pizza dough, transforming what could have been waste into a delicious and beloved snack. These knots are typically made by tying strips of dough into knots and then baking them until golden brown. Once out of the oven, they are generously brushed with a mixture of garlic, olive oil, and often a sprinkle of parsley, making them not just a side dish but a culinary experience unto themselves.
The garlic used in these knots plays a significant role beyond just flavor enhancement. Garlic has been celebrated for centuries, not only for its distinctive taste but also for its numerous health benefits. Rich in antioxidants, garlic is known to support the immune system, reduce blood pressure, and even improve cardiovascular health. By making garlic knots at home, you can control the amount and quality of garlic used, ensuring that each bite is as healthful as it is delicious.
One of the most compelling reasons to opt for homemade garlic knots over store-bought options is the difference in quality and taste. Store-bought versions often contain preservatives and artificial flavors that can detract from the authentic experience. When you make garlic knots at home, you have complete control over the ingredients, allowing you to produce a fresher, tastier product. Additionally, the joy and satisfaction of baking your own bread cannot be underestimated. The aroma of freshly baked garlic knots wafting through your kitchen is an experience that elevates the entire cooking process.
Ingredients for the Perfect Garlic Knots
To create the best homemade garlic knots, it’s crucial to use quality ingredients. Each element plays a specific role in the overall flavor and texture of the knots. Here’s a detailed look at the key ingredients you will need:
– All-Purpose Flour: This is the foundation of your dough. All-purpose flour has the right balance of protein and starch, which helps create a chewy texture in the knots. For the best results, consider using unbleached flour, which has a slightly higher protein content and can yield a better rise.
– Instant Yeast: This type of yeast helps the dough rise quickly, resulting in fluffy knots. Instant yeast is convenient because it can be mixed directly with dry ingredients without needing to be activated in water first. It’s a great option for home bakers looking to save time.
– Sugar and Salt: Sugar aids in browning the dough while also feeding the yeast, promoting a good rise. Salt not only enhances the flavor but also strengthens the dough’s gluten structure, contributing to its chewy texture. Be sure to use fine sea salt for the best distribution throughout the dough.
– Warm Water and Olive Oil: Warm water helps activate the yeast, ensuring a successful rise. The olive oil adds richness to the dough, contributing to its soft texture and flavor. Extra virgin olive oil is recommended for its superior taste and health benefits.
– Garlic: As the star ingredient, fresh garlic is essential for authentic garlic knots. You can either finely chop or mince the garlic, depending on your preference for garlic intensity. Alternatively, roasted garlic can be used for a milder, sweeter flavor.
– Herbs and Parmesan: While optional, adding fresh or dried herbs such as parsley or oregano can enhance the flavor of your garlic knots. A sprinkle of grated Parmesan cheese can also add a savory depth that complements the garlic beautifully.
When selecting your ingredients, opt for high-quality products. Fresh garlic, organic flour, and good-quality olive oil can make a noticeable difference in the final outcome. Investing in quality ingredients will not only improve the taste of your garlic knots but also elevate your overall cooking experience.
Step-by-Step Instructions
Now that you have a solid understanding of the ingredients, let’s dive into the step-by-step process of preparing homemade garlic knots.
Preparing the Dough
The first step in making garlic knots is preparing the dough. Start by combining the all-purpose flour, instant yeast, sugar, and salt in a large mixing bowl. Whisk these dry ingredients together until they are well combined. This ensures that the yeast and salt are evenly distributed throughout the flour.
Next, add the warm water and olive oil to the dry mixture. Using a wooden spoon or your hands, mix until a shaggy dough forms. At this stage, the dough will be sticky and rough, which is perfectly normal.
Once the ingredients are combined, it’s time to knead the dough. This step is crucial for developing the gluten structure, which gives the garlic knots their chewy texture. Turn the dough out onto a lightly floured surface and begin kneading it by pushing it away from you with the heel of your hand, then folding it back toward you. Rotate the dough a quarter turn after each push. Knead for about 8-10 minutes, or until the dough is smooth and elastic. You should be able to stretch it without it tearing, which indicates that the gluten is well developed.
Visual Cues for Dough Consistency
As you knead, look for visual cues that indicate the dough is ready. The dough should be smooth, slightly tacky to the touch (but not overly sticky), and should spring back when gently pressed with your finger. If it feels too sticky, you can gradually incorporate a little more flour as needed, but be careful not to add too much as it can lead to dense knots.
The First Rise
After kneading, it’s time for the dough to rise. Form the dough into a ball and place it in a lightly oiled bowl, turning it to coat the surface with oil. This helps prevent the dough from drying out during the rising process. Cover the bowl with a clean kitchen towel or plastic wrap to create a warm, moist environment for the dough to rise.
The rising process is significant not only for the dough to expand but also for developing the complex flavors that will define your garlic knots. Allow the dough to rise in a warm spot for about 1 to 1.5 hours, or until it has doubled in size. A good place for rising dough is in an oven that has been turned off but with the light on; the gentle warmth creates an ideal environment for the yeast to work its magic.
Suggestions for Creating an Ideal Rising Environment
For optimal rising, ensure that the area is draft-free and warm. If your kitchen is cool, you can also place the bowl near a radiator or in a sunny spot. Avoid letting the dough rise in a cold environment, as this will slow down the fermentation process and may result in a denser texture.
As you wait for the dough to rise, take a moment to prepare your garlic butter mixture. Melt some butter in a small saucepan and add minced garlic along with a pinch of salt and chopped herbs, if using. This buttery mixture will be brushed over the knots after baking, infusing them with that signature garlic flavor.
Stay tuned for the next part of this article, where we will dive into shaping the garlic knots and the baking process that brings this delightful recipe to life. Making homemade garlic knots is not just about the end product; it’s about the joy of creating something delicious with your own hands. Embrace the process and get ready to savor every bite!
Shaping the Knots
The art of shaping garlic knots is not only fun but also a vital step in creating those delightful, fluffy bites of goodness. To begin, take a piece of dough roughly the size of a golf ball. Lightly flour your work surface and your hands to prevent sticking.
1. Rolling the Dough: Start by rolling the dough ball into a long rope that is about 10-12 inches in length. The thickness should be approximately half an inch. The dough should stretch easily but not tear, indicating that it has risen properly.
2. Tying the Knot: Once you have your rope, take one end and form a loop, bringing it over the other end. Then, tuck the end through the loop. Pull gently to tighten the knot. This should create a beautiful, twisted shape.
For a visual guide, consider watching a quick video tutorial or checking out images online, as seeing the process can be immensely helpful. Practice makes perfect, and soon, you’ll be shaping knots like a pro!
The Second Rise
After shaping all your knots, it’s important to allow them a second rise. This step is crucial for achieving the fluffy texture that we all love in garlic knots.
– Why the Second Rise Matters: The second rise allows the yeast to work its magic once more, creating air pockets in the dough. This is where the knots gain their airy, light texture.
– How to Achieve It: Place the shaped knots on a baking sheet lined with parchment paper. Cover them with a clean kitchen towel and let them rise in a warm area for about 30 minutes. You’ll know they are ready when they have puffed up slightly, nearly doubling in size.
Preparing the Garlic Butter
Now, let’s prepare the garlic butter that will elevate your knots from delicious to extraordinary. The garlic butter acts as both a flavoring agent and a finishing touch.
1. Ingredients Needed: For the garlic butter, you will need:
– ½ cup unsalted butter (1 stick), melted
– 4-6 cloves of garlic, minced (adjust to your preference)
– 2 tablespoons fresh parsley, finely chopped
– ½ teaspoon salt
– ¼ teaspoon black pepper
– Optional: a pinch of red pepper flakes for a hint of heat
2. Step-by-Step Preparation:
– In a small saucepan over low heat, melt the butter gently.
– Add the minced garlic and sauté for about 1-2 minutes until fragrant. Be careful not to let the garlic brown, as it can turn bitter.
– Remove from heat and stir in the parsley, salt, and black pepper. Allow the mixture to cool slightly before brushing it onto the knots.
3. The Role of Herbs: Fresh herbs like parsley not only enhance the flavor but also add a splash of color, making your garlic knots visually appealing. You can also experiment with other herbs such as oregano or thyme to personalize the taste.
Baking the Knots
Baking your garlic knots is where the magic happens! The goal is to achieve a golden-brown exterior with a soft, fluffy interior.
1. Ideal Baking Conditions: Preheat your oven to 400°F (200°C). Once the oven is hot, place your baking sheet with the knots inside. Bake for about 15-20 minutes, keeping a close eye on them.
2. Signs of Proper Baking: Your garlic knots are done when they are golden brown on the top and sound hollow when tapped on the bottom. If you’re unsure, a quick internal temperature check should read around 190°F (88°C).
Final Touches
Once your knots are out of the oven, it’s time for the final flavor boost!
1. Applying the Garlic Butter: Immediately brush the warm knots with the prepared garlic butter mixture. Ensure you cover them generously for maximum flavor absorption.
2. Optional Garnishes: For an extra touch, sprinkle your knots with grated Parmesan cheese or a dash of Italian seasoning. These garnishes add depth to the flavor profile and make them even more irresistible.
Serving Suggestions
Garlic knots are incredibly versatile and can be enjoyed in various ways:
– As Appetizers: Serve them warm with a side of marinara or garlic dipping sauce for a perfect starter.
– As Side Dishes: Pair them with Italian dishes like pasta, salads, or soups. Their buttery flavor complements many meals beautifully.
– As Snacks: Enjoy them on their own or with cheese for a satisfying snack any time of day.
Pairing Ideas: Consider serving your garlic knots alongside marinara sauce, pesto, or even a spicy sriracha mayo for a kick. They also pair well with wines like Chianti or a refreshing Italian soda.
Storing Leftovers: If you happen to have any leftovers, place them in an airtight container. They can be kept in the refrigerator for up to 3 days. To reheat, simply pop them in the oven at 350°F (175°C) for 5-10 minutes until warmed through. This will help restore their original texture.
Health Benefits of Garlic
Garlic is not just a flavor powerhouse; it also offers numerous health benefits:
– Nutritional Benefits: Garlic is rich in vitamins C and B6, manganese, and selenium. It’s known for its antioxidant properties and potential to boost the immune system.
– Heart Health: Studies suggest that garlic may help lower blood pressure and cholesterol levels, contributing to overall heart health.
– Olive Oil and Fresh Herbs: Using olive oil in your garlic butter not only adds flavor but is also a heart-healthy fat. Fresh herbs enhance the nutritional value and add essential vitamins.
Incorporating homemade garlic knots into your diet can be a delightful way to enjoy these health benefits while savoring a delicious treat.
Conclusion
Making homemade garlic knots is a rewarding experience that fills your kitchen with an irresistible aroma and brings joy to your dining table. The satisfaction of kneading the dough, shaping the knots, and brushing on that rich garlic butter is unmatched.
We encourage you to try this recipe and experience the delightful flavors firsthand. Cooking from scratch not only allows you to control the ingredients but also connects you to the food you eat, creating a deeper appreciation for the culinary process.
Whether served as appetizers at a gathering or enjoyed on a cozy night in, garlic knots are sure to please. So roll up your sleeves, embrace the process, and enjoy delicious homemade garlic knots that are sure to become a family favorite!
